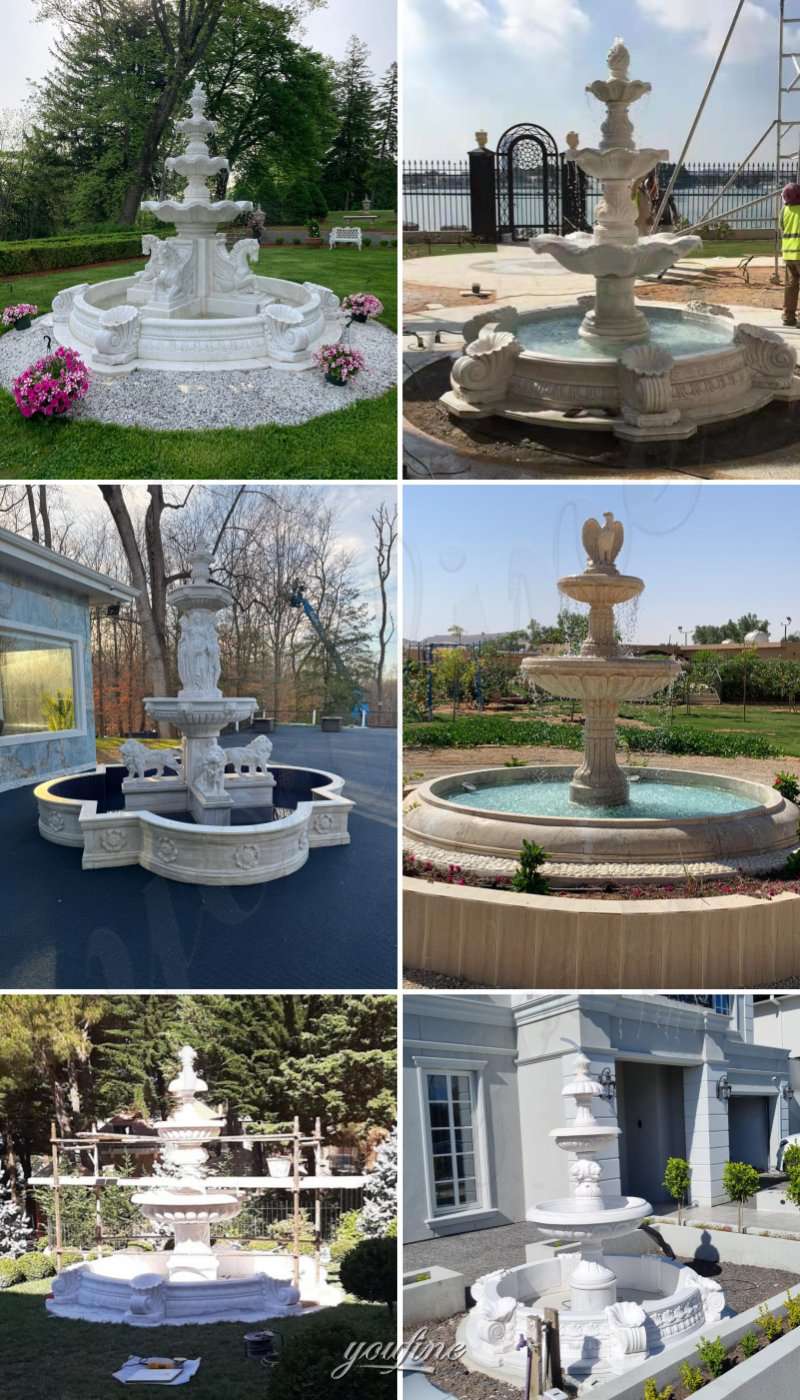
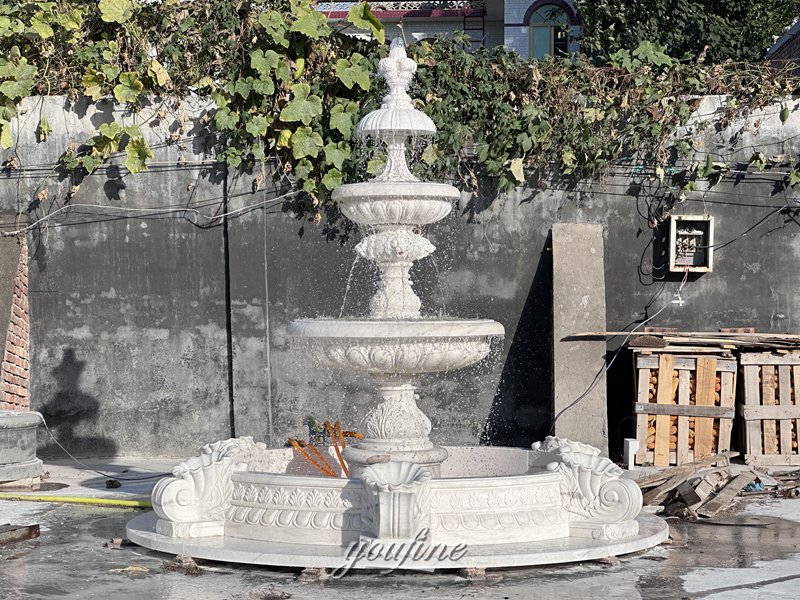
In our busy lives, we often long for a peaceful, relaxing space, and a marble fountain is the perfect complement to this environment. Not only does it add an elegant artistic touch to a courtyard, garden, or terrace, it also brings peace and comfort through the sound of flowing water.
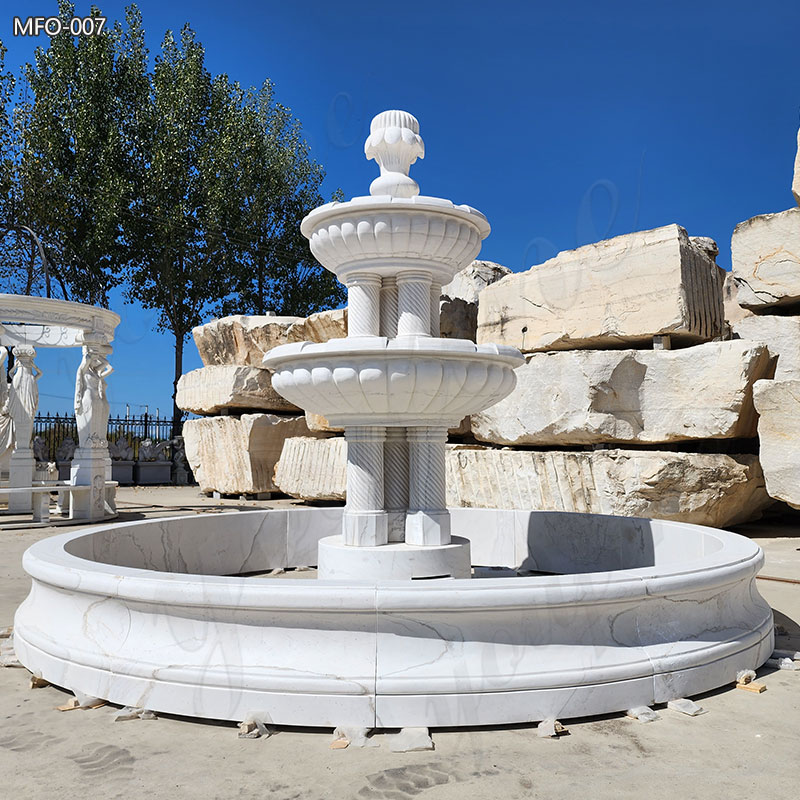
Although it may seem complicated, it doesn’t take much skill to install a simple marble tiered water fountain. Just follow the right steps and only 3 people can easily complete the installation and enjoy this beautiful water feature.
This blog will provide you with a step-by-step installation guide to help you bring this peaceful beauty into your home.

Pre-installation Preparations
Before installing a marble tiered water fountain, it is essential to do adequate preparation. Proper preparation will not only ensure a smooth installation process, but also help you avoid subsequent maintenance issues.
Level Ground: The fountain needs a stable and solid foundation. If the ground is uneven, the fountain may tilt, affecting the water flow effect and may cause damage to the water pump. It is recommended to use a concrete foundation or lay stone slabs to ensure a stable ground.
Convenient Drainage: Make sure the drainage system of the fountain is unobstructed to avoid water accumulation. It would be better if there is a drainage pipe or natural water flow.
Close to Power and Water Sources: The selected location is preferably near power and water sources. This will facilitate the entire operation of your fountain.
Tools and Materials: water pump, water pipe, power cord, waterproof glue, level, concrete, crane (the tonnage of the crane is based on your actual fountain, generally 8 tons), scaffolding (the number is still determined by the size of the fountain), 3 workers.
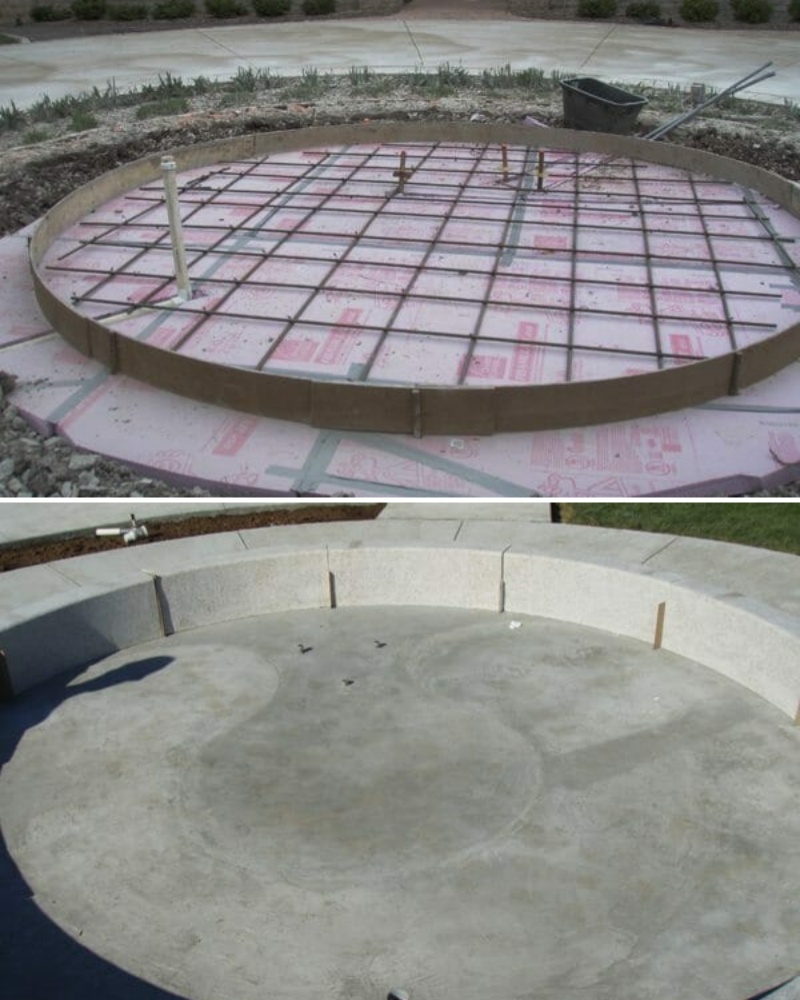
Foundation Preparation
To ensure that the marble fountain is installed firmly and permanently, foundation preparation is essential
Clear the Site: Remove any debris, plant roots, or other obstacles that may affect the installation. Make sure the ground at the installation site is flat and has good drainage.
Dig the Foundation: Dig a pit according to the size of the fountain foundation, usually 12-18 inches (about 30-45 cm) deep to accommodate the gravel layer and concrete foundation. Make sure the bottom of the pit is flat and solid. If there are large rocks or tree roots in the ground, they must be removed first to avoid affecting subsequent installation.
Add a Gravel Layer: Lay a layer of gravel or crushed stone at the bottom of the pit, which will help with drainage and ensure the stability of the concrete. Use a compacting tool (such as a tamping machine) to compact the gravel to ensure that it is even and dense.
Pour the Concrete: Pour the concrete into the excavated pit, making sure it fills the entire area and reaches the desired height. Use a trowel to smooth the surface and ensure that the concrete layer is even and flat. Use a level to check the flatness of the concrete foundation. Make sure it is completely level and aligned with the surrounding ground.
Install the Fountain Parts: While the concrete is still wet (but hard enough), gently place the base or column of the fountain on the concrete and press it down to form an impression, which will help to firmly fix the fountain parts to the foundation. Doing so will ensure the stability of the fountain and prevent it from loosening or tilting later.
Cure the Concrete: After the concrete is poured, we recommend curing it for 24-48 hours. This process is very important to ensure that the concrete is strong enough and not easily damaged. During this period, avoid footsteps or heavy objects coming into contact with the concrete surface.
Waterproofing: After the concrete is fully cured, you can consider applying a waterproof sealant to the concrete surface to prevent moisture from penetrating, thereby extending the life of the foundation.
Inspection and Adjustment: After the concrete is completely dry, carefully check whether the foundation is flat and make sure there are no uneven areas. If necessary, use sandpaper or other tools to trim it.
With these steps, you can ensure that the foundation of the marble fountain is both strong and stable, providing a perfect foundation for the subsequent fountain installation. This foundation will not only support the weight of the fountain, but also effectively prevent water accumulation or leakage in the pool, ensuring the long-term stable operation of the fountain.
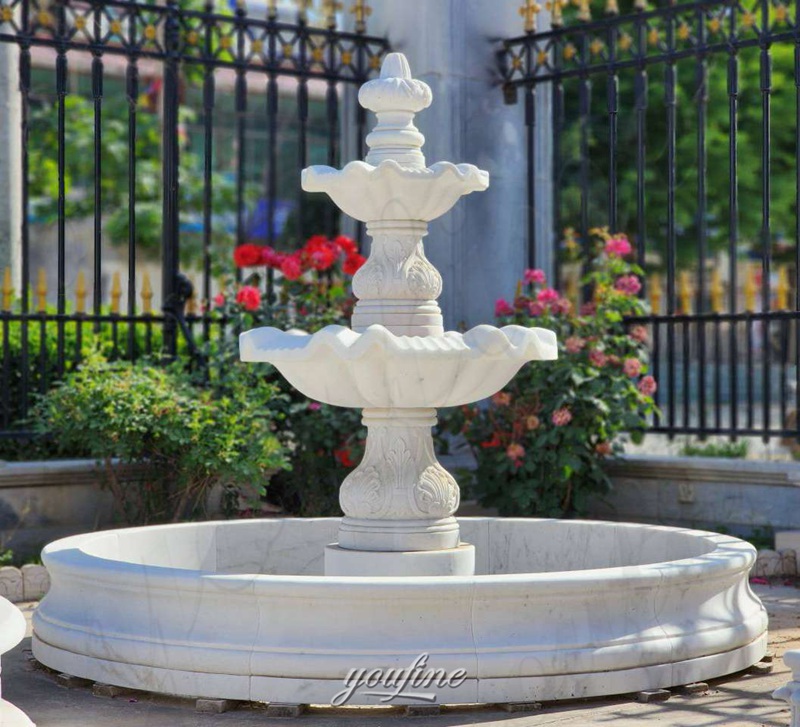
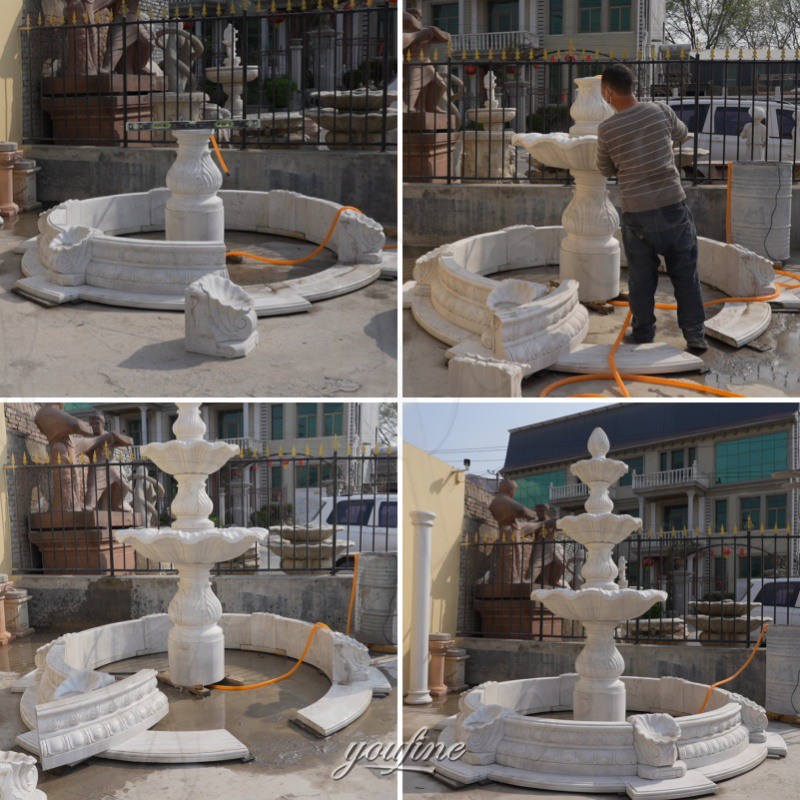
Assembling the Marble Fountain
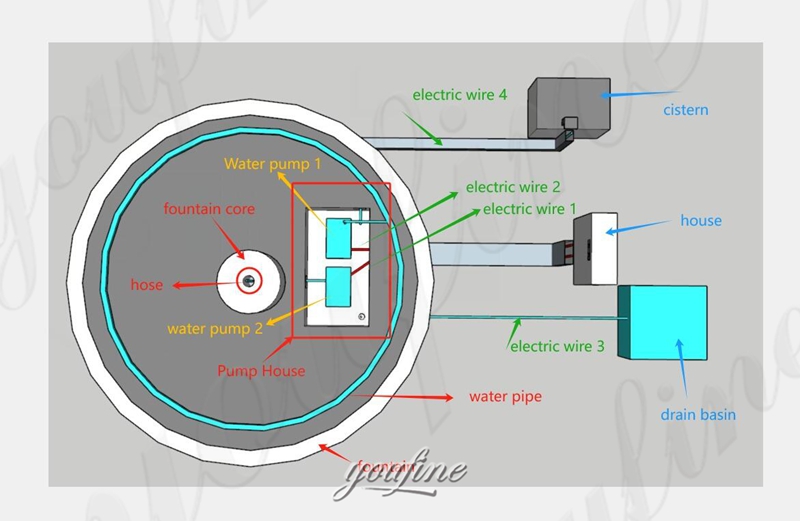
The marble installation drawings provided by YouFine and each floor mat are numbered. You only need to install the floor mat in the order of the numbers. Installing the pump and pipes is a key step to ensure the proper function of your marble fountain. The pump is responsible for circulating water to the various levels of the fountain, while the pipes are the pipes that connect the pump to the fountain.
Positioning the Pump: Place the pump in the pool at the bottom of the fountain. Make sure the pump is fully submerged in the water and in a secure position. Most fountain pumps are designed to be submerged and need to be fully submerged in water to work properly.
Adjusting the Position: Check the suction port of the pump to ensure that there are no obstacles blocking the water flow and that the pump is positioned to pump water evenly.
Pump Bracket: If there is a bracket or platform at the bottom of the fountain, make sure to install the pump on it to avoid direct contact with the ground to prevent mud or debris from entering the pump and affecting its normal operation.
Selecting the Pipe: Choose the appropriate pipe according to the size of the pump outlet. Generally, the pump’s manual will provide the outlet size, and ensure that the inner diameter of the pipe is suitable for the pump’s output.
Next, install the various parts of the fountain from bottom to top. If necessary, you need to set up a level ruler, otherwise it will affect the water column and water flow effect when the tiered fountain sprays water. Our installation manual has detailed assembly instructions that professional workers can understand. In addition, if you encounter any challenges during the installation process, you can contact us at any time and professionals will assist you in solving all the problems you encounter.
Install the Water Pipes
Installing the Pipe: Connect one end of the pipe to the pump’s outlet and ensure a tight connection. Use pipe clamps or special connectors to ensure that the pipe does not fall off or leak.
Guide the Water Pipe: Guide the water pipe at the other end to the top of the fountain or the location of each layer. If the fountain has multiple nozzles or water outlets, the water pipe can be branched to ensure that the water flow is evenly distributed.
Fix the Water Pipe: Use cable ties or pipe clamps to fix the water pipe in a suitable position to prevent the water pipe from being deformed or interfering with the appearance of the fountain.
Testing and Checking
The following steps will ensure that the pump and pipes are installed smoothly and provide a continuous and stable water flow to the fountain. The testing and debugging phase is very important to ensure that the pump operates properly and avoid problems later.
Connect to the Power Supply: If the pump is electric, make sure the power cord of the pump is connected to a safe socket. Use waterproof cables to connect the pump to ensure that there is no risk of electrical failure or electric shock.
Check the Safety of the Power Cord: Make sure that the power cord is not compressed or in contact with water to avoid electrical short circuits or failures. If the fountain is installed outdoors, use a waterproof socket or socket box.
Turn on the Pump: After connecting the pump and pipes, turn on the power and start the pump. Observe whether the water flow is even and stable. If the water flow is weak or unstable, check whether the pump is blocked and the water pipe connection is secure.
Adjust the Direction of the Water Flow: If the direction of the water flow is not ideal, you can adjust the position of the fountain components or the angle of the nozzle to make the water flow present the best effect.
Check for Leaks: Check the pump, pipes and connections for leaks. If leaks are found, adjust the connections in time and reinforce the seal.
Maintenance and Care
To ensure that your marble fountain operates stably and for a long time and maintains its beauty, regular care and maintenance are essential. Here are some basic care and maintenance tips to help you keep your fountain in top shape.
Clean the Pool and Pump Regularly: Check the pool of the fountain monthly to remove debris, leaves and sediment from the water. Check and clean the pump quarterly or whenever you notice a weakening of the water flow. The filter of the pump may be clogged with impurities and needs to be cleaned regularly.
Change the Water Source: To keep the water clean and avoid algae or bacteria in the water, the water in the pool should be changed regularly. The frequency of water change depends on the size of the pool and the surrounding environment, but it is generally recommended to change it every 2-4 weeks.
Prevent Pump Scaling and Clogging: Check the pump pipe regularly for blockages, especially in winter or after a long period of non-use. Blockages may be caused by mineral deposits, algae or leaves. When cleaning, a mild detergent or vinegar-water solution can be used to remove scale.
Prevent Freezing (for cold areas): If the fountain is installed in a cold area, measures must be taken to prevent the pump and pipes from freezing when the temperature is low in winter. You can:
- Drain the water from the fountain.
- Cover the fountain with a waterproof cover.
- Use a heater or insulation cover on the fountain in cold weather to prevent the water pipes and pump from freezing.
Check the Electrical System: If the water pump is powered by electricity, regularly check the wires, power sockets and power connections to make sure they are not damaged or worn. Pay special attention to safety when using electrical equipment and avoid contact between power cords and water.
Cable Protection: Make sure that power cords and water pipes do not cross and overlap to avoid wear and tear. Especially in cold weather, check the cables for cracks and replace damaged wires in time.
Water Flow Inspection: Regularly observe the water flow effect of the fountain to ensure that the water pump is working properly and providing a stable water flow. If the water flow suddenly becomes smaller or abnormal, it may be a water pump failure or a water pipe blockage, which needs to be checked and repaired in time.
In Conclusion
Through the above steps, you have completed all the key links from foundation preparation to fountain installation. Whether it is the excavation of the foundation, the pouring of concrete, or the connection of the water pump to the water pipe, every detail is directly related to the stability and service life of the fountain. After installation, regular cleaning and maintenance will ensure that the fountain continues to play its beauty and function, becoming a highlight in your garden or courtyard. As long as it is inspected and maintained on time, your fountain will bring you years of tranquility and beauty, making every drop of water flow a part of your life.
Of course, the quality of the fountain itself is also crucial, and you need to choose a reliable supplier. As a professional factory with 40 years of experience, we can provide you with professional services throughout the process, including fountain design, carving, and subsequent installation guidance. Please feel free to contact YouFine if you need it.